Every golfer has experienced it — the thin, low shot that stings the hands, or the fat shot that barely gets half-way to the green. These frustrating misses share a common cause: poor control of the swing’s low point. The good news? The best players in the world have a simple movement pattern that virtually guarantees solid contact, and you can learn it too.
What Is the “Low Point” and Why Does It Matter?
In a well-executed iron swing, the club reaches its lowest point just after the ball — this is what creates that crisp, ball-then-turf contact you see tour players make. When your low point is behind the ball, you either hit the ground first (fat) or your club bounces up and catches the ball thin. Controlling your low point is the difference between a golfer who strikes the ball consistently and one who never quite knows what they’re going to get.
The Move the Best Players Make
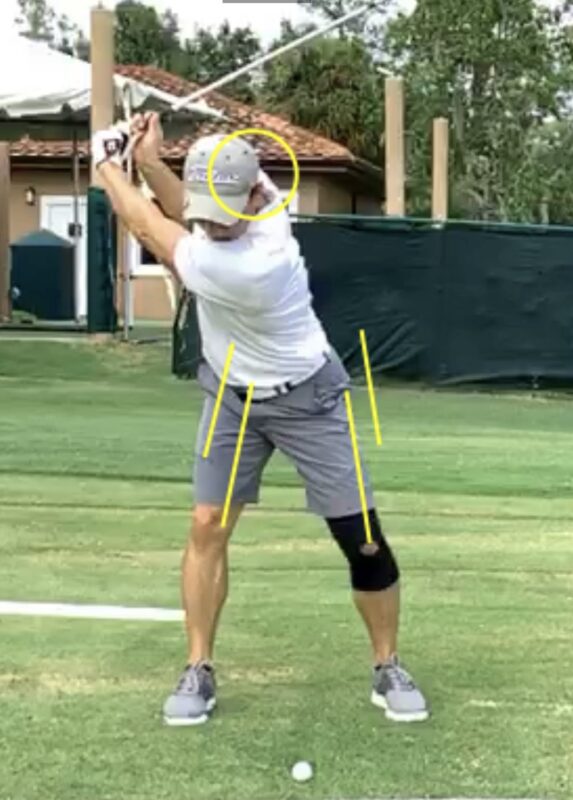
Here’s what separates tour players from most amateurs: the best players begin shifting their weight toward the front side — what I call “re-centering” before they even finish their backswing. Watch any elite player in slow motion and you’ll see it clearly. While the club is still traveling to the top, the lower body has already started moving toward the target.
This early weight shift is not an accident. It’s a trained movement pattern that ensures the body’s center of mass arrives on the front side in time to deliver the club on the correct path — through the ball, not into the ground behind it.
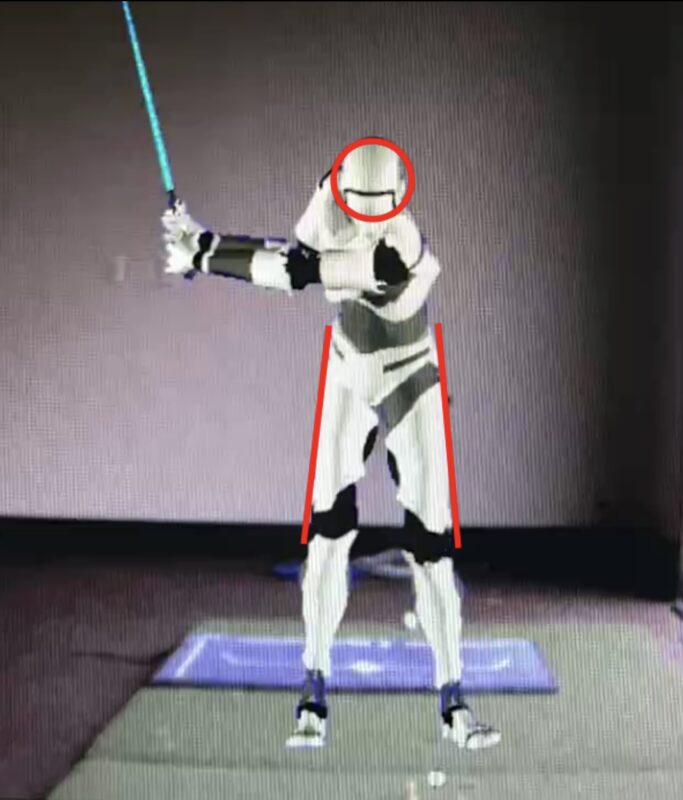
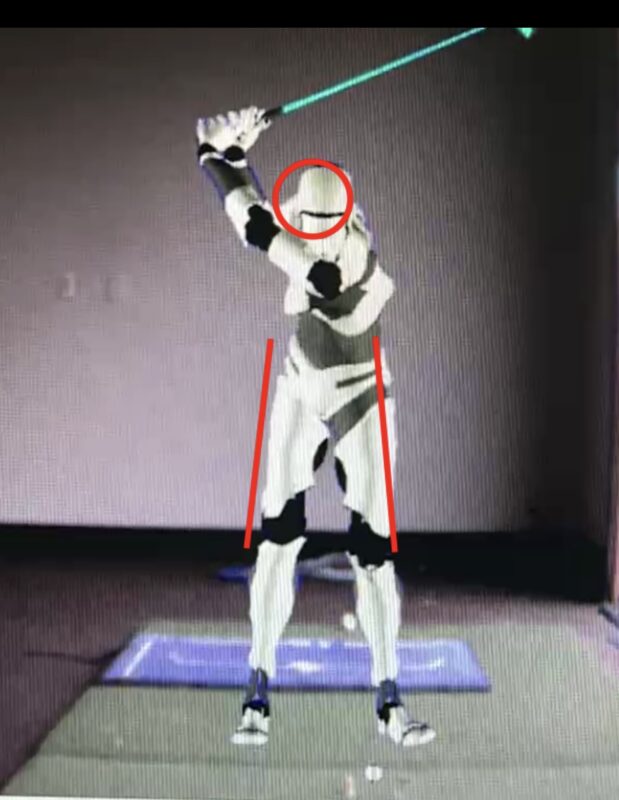
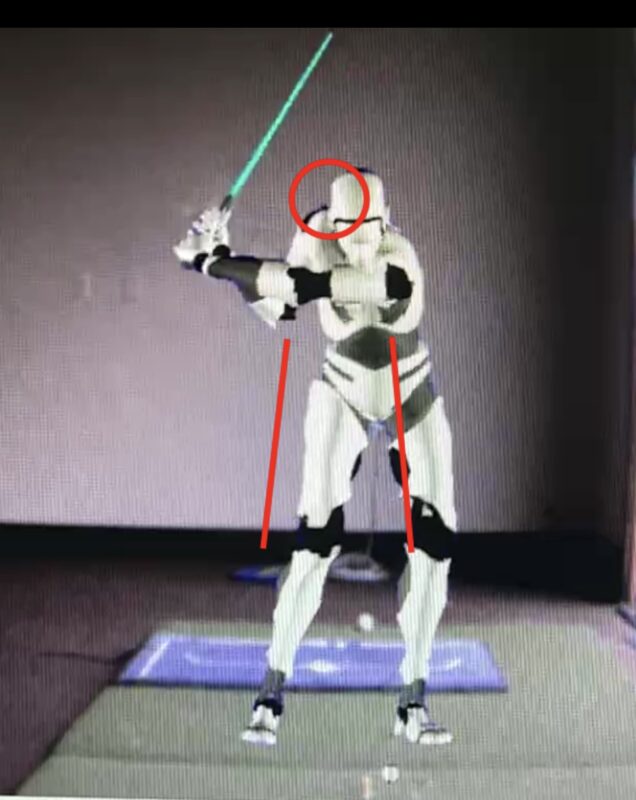
The three photographs below show our model pro demonstrating exactly what this looks like in a real swing:
What Most Amateurs Do Instead
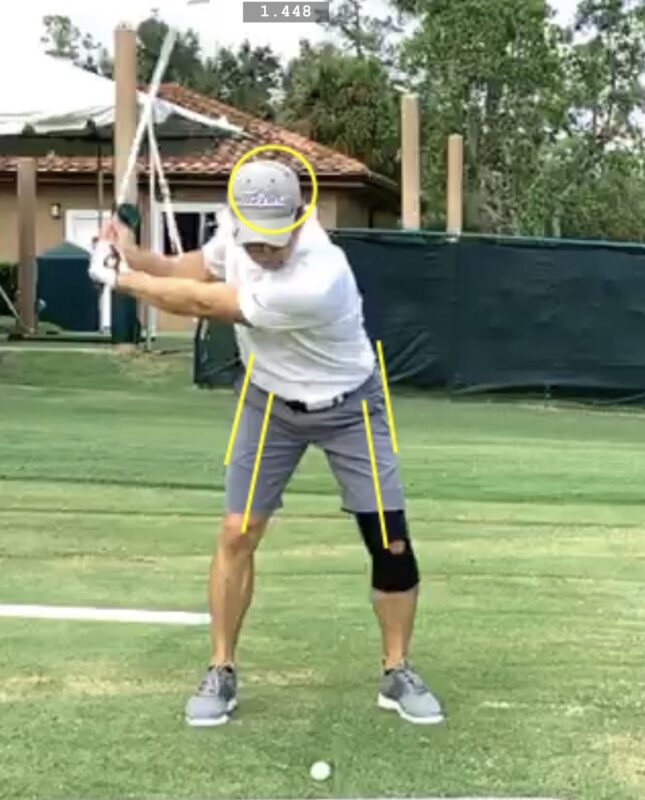
The typical amateur continues shifting weight to the trail side late in the backswing. By the time they start their downswing, they are already behind and struggling to catch up. The result is a low point that falls behind the ball — and that means fat and thin shots, inconsistent distances, and unpredictable trajectories.
This is not a lack of effort or athleticism. It is simply a timing and sequencing issue — and one that is very correctable with the right drills.
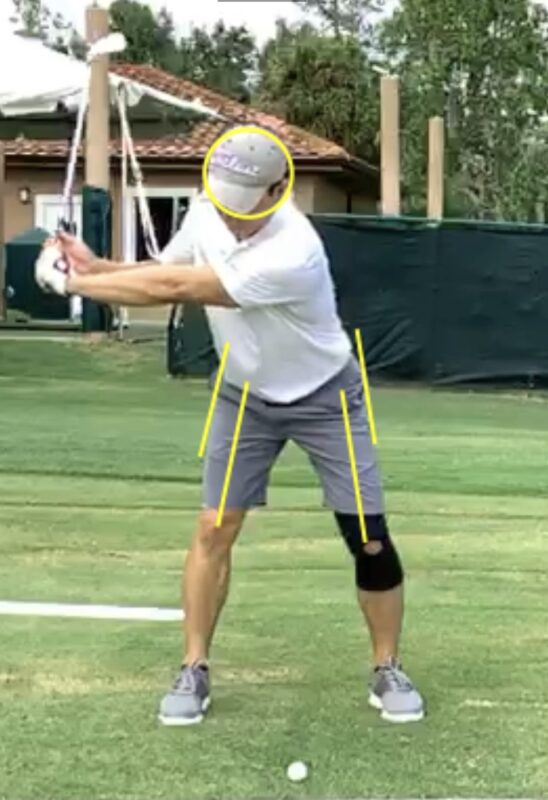
The three photographs below show an amateur golfer demonstrating this common pattern, and how it differs from what the model pro does at each stage:
Three Drills to Train the Re-Center Move
Drill 1 — The Pump and Go
Begin your backswing and stop at the halfway point — club and arms parallel to the ground. From here, pump the club and arms upward as if continuing to the top of the backswing, and as you do, consciously start moving your weight toward your front side. This is the key moment: your arms are still going back while your lower body is already beginning to shift forward — exactly what the best players do naturally.
Pump two or three times to really feel this separation between upper and lower body, then let it flow into a full swing. What you’ll notice is that by the time your arms reach the top, your weight is already where it needs to be — and solid contact becomes much easier to achieve. Repeat this drill several times before hitting balls so that the timing becomes a feeling you can reproduce in your actual swing.
Drill 2 — The Step and Go
Begin your backswing and as the club and arms reach the halfway point, make a small step toward the target with your front foot. This step is the trigger — it gets your weight moving to the front side while your arms are still completing the backswing. Just like the Pump and Go drill, you are training your body to experience that crucial separation: lower body moving forward while the upper body and arms finish going back.
The step doesn’t need to be large. It is a deliberate, controlled shift that mimics the re-centering move the best players make automatically. Once your front foot plants, let the downswing flow naturally from there. You’ll quickly notice that the club arrives at the ball from a much better position — and solid, crisp contact becomes the natural result. Repeat this several times before hitting balls and notice how your contact improves and it is nearly impossible to stay stuck on your trail side.
Drill 3 — The Medicine Ball Wall Toss
You don’t need a club or a golf course for this one — just a medicine ball and a solid wall. Stand sideways to the wall, holding the medicine ball in front of you with both hands. Swing the ball back as you would make a backswing, and as it reaches the halfway point, step with your front foot toward the wall — just as you practiced in the Step and Go drill. Once you land on your front leg, toss the ball into the wall as you would release the golf club through the downswing.
What you’ll immediately feel is how natural and athletic the weight transfer becomes when you commit to that move to the front foot. Your body already knows how to move this way — this drill simply connects that athletic instinct to your golf swing. The wall toss is an excellent drill to do at home or at the gym, and the more you repeat it the more the re-center timing becomes second nature on the course.
Watch It in Action
I’ve put together a video demonstrating the re-center move using the model pro from our book Swing Like a Pro. You’ll see exactly what this weight shift looks like from mid-backswing through the top and into the start of the downswing.
Watch the video here on YouTube.
The Bottom Line
Solid iron play is not about swinging harder or making dramatic swing changes. It’s about sequencing — getting your body to the right place at the right time. Master the re-center move and you’ll find consistent contact, better distance control, and a more predictable ball flight follow naturally.